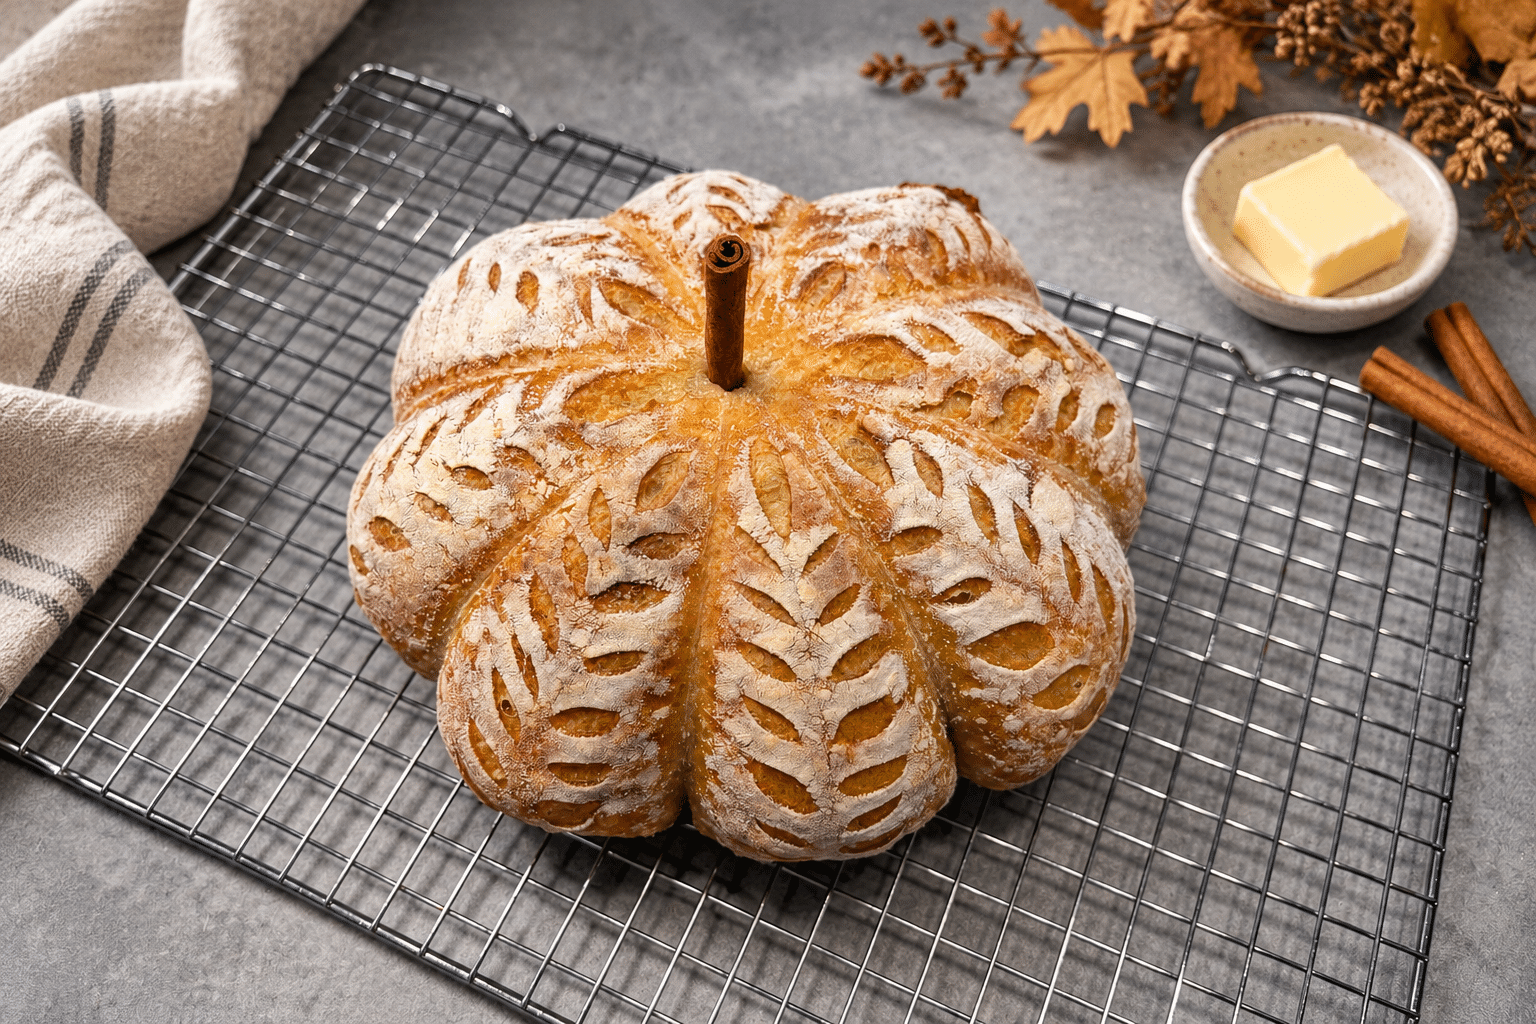
Pumpkin-Shaped Sourdough Bread
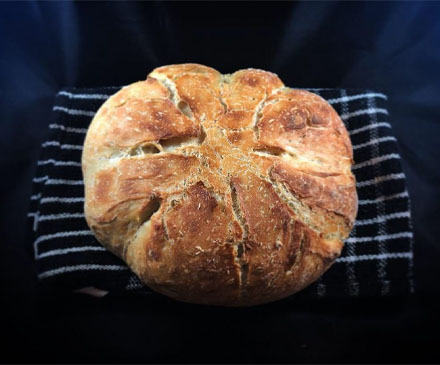
There is something so satisfying about turning a simple loaf of bread into something beautiful. This pumpkin-shaped sourdough bread has all the things I love about homemade sourdough—a golden crust, a tender center, and that familiar tang—with a little fall personality.
And if you are like me and love the look of pumpkins more than pumpkin spice, this one is for you! There is no pumpkin purée or pumpkin spice in the dough. It is a plain sourdough loaf shaped like a pumpkin using kitchen twine.
I use 150g of active sourdough starter for this recipe, along with bread flour, water, and salt. A cold proof gives you flexibility with the baking schedule, and the pumpkin shape comes together just before the loaf goes into the oven.
No starter? I have included a yeast alternative below, with its own rising instructions.
If you are new to sourdough, start with my step-by-step sourdough bread guide for more help with starter care, folding, and fermentation.
Why you will love this bread
- Four basic dough ingredients.
- A festive shape without a special bread mold.
- A plain loaf that works with sweet or savory toppings.
- An overnight sourdough schedule that lets you bake the following day.
- A beautiful addition to a fall gathering or Thanksgiving table.
Is this pumpkin-flavored bread?
No. “Pumpkin-shaped” describes the appearance of the loaf. This is crusty sourdough bread, rather than a sweet pumpkin quick bread.
There is no pumpkin purée, cinnamon, or pumpkin spice in this dough. Adding purée would change the dough’s moisture and handling, so it should not be added without adjusting the recipe.
Ingredients you will need
Bread flour: Helps the dough develop strength and hold its round shape.
Water: Use room-temperature water. The recipe uses 325g in the dough, plus the water already in the starter.
Active sourdough starter: Use a bubbly starter that reliably rises after feeding, ideally at or close to its peak. This recipe assumes a 100% hydration starter, maintained with equal weights of flour and water.
Salt: Adds flavor and helps strengthen the dough.
You will also need a little flour for shaping, rice flour or regular flour for the proofing basket, and a little neutral oil to lightly coat the twine.
Equipment
Have a kitchen scale, mixing bowl, dough scraper, round proofing basket or towel-lined bowl, covered Dutch oven, baking parchment suitable for the oven temperature, scissors, and a cooling rack ready.
For shaping, use food-safe, heatproof 100% cotton kitchen twine rated for the baking temperature. Craft string, dyed string, and synthetic cord are not suitable substitutes.
How to make pumpkin-shaped sourdough bread
1. Mix the dough
Stir 150g active starter into 325g water. Add 500g bread flour and 10g salt. Mix until no dry flour remains, cover, and rest for 30 minutes.
The dough will look rough at first. It becomes smoother and more elastic as it rests and you work through the folds.
2. Build strength with folds
With damp hands, lift one side of the dough and fold it toward the center. Turn the bowl and repeat until you have folded all four sides.
Complete four sets of stretch and folds, about 30 minutes apart. If the dough still spreads very quickly, add one or two gentle coil folds at 30-minute intervals.
3. Finish bulk fermentation
Let the dough continue rising, covered, until it looks airy, slightly domed, and noticeably expanded, with bubbles around the edges and a gentle jiggle.
As a starting guide, look for about a 50–75% increase in volume rather than waiting for it to double. Total bulk fermentation may take roughly 4–8 hours from mixing, including the resting and folding time. A cool kitchen or less vigorous starter may take longer.
Watch the dough more closely than the clock. Dough that has become very slack and difficult to shape may have fermented too far.
4. Shape and refrigerate
Turn the dough onto a lightly floured surface. Gently pre-shape into a round and rest for 15–20 minutes.
Shape into a taut boule without tearing the surface. Place seam-side up in a well-floured round proofing basket. Cover and refrigerate for 8–16 hours.
5. Tie the pumpkin shape
Preheat the oven and Dutch oven to 450°F (230°C), following your Dutch oven manufacturer’s preheating guidance.
Cut four pieces of twine, each long enough to go around the loaf with room for a loose knot. About 30–36 inches per piece is a useful starting length; trim excess after tying. Lightly oil the lengths that will touch the dough.
Lay the twine on baking parchment in an evenly spaced, overlapping star. Turn the cold dough out onto the center so it sits seam-side down.
Bring the two ends of each piece up around the loaf and tie loosely over the top. Four pieces create eight pumpkin sections. Let the twine rest against the dough without digging into it; the loaf needs room to expand.
Trim long tails. Make a short expansion score in an exposed section between the strings, avoiding the twine.
6. Bake
Carefully lower the dough and parchment into the hot Dutch oven. Cover and bake at 450°F (230°C) for 30 minutes.
Remove the lid, reduce the temperature to 425°F (220°C), and bake for another 12–17 minutes, or until the loaf is well browned and baked through. If needed, continue baking a few minutes longer; a center temperature around 205–210°F (96–99°C) is a useful guide.
7. Cool and remove the twine
Transfer to a cooling rack. When the loaf is cool enough to handle, snip and gently peel away every piece of twine, checking underneath the loaf as well.
Allow the bread to cool fully before slicing, usually at least two hours. Cutting too early can leave the crumb sticky.
Tips for a defined pumpkin shape
Build strength before shaping. A dough that can hold a round shape is easier to turn into a pumpkin.
Tie the dough while cold. It is firmer and easier to handle straight from the refrigerator.
Keep the spacing even and the knots loose. The bread forms rounded sections as it expands against the twine.
Do not rush cooling. Letting the interior finish setting makes a difference when you cut into the loaf.
Can I make it with yeast instead?
Yes, you can make a pumpkin-shaped artisan loaf without a starter. It will have a different flavor and a faster schedule.
This is a proposed, untested adaptation of the sourdough formula. The 150g starter contributes 75g flour and 75g water, so the yeast version replaces those amounts to preserve the dough’s overall proportions.
Use:
- 575g bread flour
- 400g water
- 10g salt
- 4g instant yeast, approximately 1¼ teaspoons
Mix all ingredients and knead until smooth and elastic, about 8–10 minutes by hand. Cover and let rise until roughly doubled, about 1–2 hours in a comfortably warm kitchen.
Pre-shape, rest for 15–20 minutes, and shape into a round. Place seam-side up in a floured proofing basket. Cover and let rise until puffy and a light finger press springs back slowly, roughly 45–75 minutes.
Preheat the oven and Dutch oven during the final rise. Turn the dough onto the prepared twine and parchment, tie loosely, score, and bake using the same temperatures and doneness cues as the sourdough version.
Do not use the sourdough bulk-fermentation and overnight-proof schedule for this yeast quantity. Rise times are estimates; follow the dough’s appearance.
Serving and storage
Slice and serve with butter, olive oil, soup, or your favorite savory spread. Leftover slices are lovely toasted the next day.
Keep the fully cooled loaf in a bread bag or wrapped at room temperature for up to two days for the best texture. For longer storage, slice and freeze in an airtight freezer bag for up to three months. Toast slices directly from frozen.
Frequently asked questions
Can I use sourdough discard?
Discard is not a direct replacement for active starter in the naturally leavened version. Use a starter that reliably rises after feeding.
Do I need a pumpkin-shaped pan?
No. A round loaf and four pieces of suitable kitchen twine create the shape.
Do I tie the strings before the cold proof?
For this method, refrigerate the shaped boule first and tie the strings just before baking.
Why did my loaf spread?
It may need more dough strength, firmer shaping, or a shorter bulk fermentation. Check how the dough feels and rises instead of following the clock alone.
Why did the twine get stuck?
It may have been tied too tightly or insufficiently oiled. Snip it into smaller sections and peel it away gently. Make sure no pieces remain before serving.
Can I bake it without the pumpkin shape?
Yes. Skip the twine, score the boule normally, and use the same baking method.
From my kitchen to yours
If you make this pumpkin-shaped sourdough bread, leave a rating and a comment below—I would love to hear how it turned out! Share your loaf on Instagram and tag @flavoredbyfatima so I can see your beautiful bread.
Pumpkin-Shaped Sourdough Bread
A crusty homemade sourdough loaf shaped like a pumpkin, with a soft, airy center.
1
loaf45
minutes47
minutesIngredients
500 g bread flour
325 g water, room temperature
150 g active sourdough starter, 100% hydration
10 g salt
Flour, for the work surface
Rice flour or flour, for the proofing basket
Neutral oil, a small amount to coat the twine
Directions
- Mix: Stir starter into water. Add flour and salt and mix until no dry flour remains. Cover and rest 30 minutes.
- Fold: Complete four sets of stretch and folds, about 30 minutes apart. Add one or two gentle coil folds if the dough still needs strength.
- Bulk ferment: Cover and let rise until airy, slightly domed, jiggly, and about 50–75% larger. Allow roughly 4–8 hours total from mixing, including folds; follow the dough rather than the clock.
- Pre-shape: Turn onto a lightly floured surface, form a loose round, and rest 15–20 minutes.
- Shape and chill: Shape into a taut boule, place seam-side up in a floured basket, cover, and refrigerate 8–16 hours.
- Preheat: Preheat the oven and Dutch oven to 450°F (230°C), following manufacturer guidance.
- Tie: Lightly oil four long pieces of suitable twine. Arrange in a star on parchment. Turn the cold loaf onto the center, seam-side down. Tie each pair of ends loosely over the top to form eight sections. Trim tails and make a short score between strings.
- Bake covered: Transfer to the Dutch oven and bake, covered, at 450°F (230°C) for 30 minutes.
- Finish uncovered: Remove the lid, reduce to 425°F (220°C), and bake 12–17 minutes longer, extending as necessary until well browned and baked through. Aim for a center temperature around 205–210°F (96–99°C).
- Cool: Transfer to a rack. When safe to handle, cut and remove all twine. Cool fully, usually at least two hours, before slicing.
Timing: Active prep is about 45 minutes spread across mixing, folds and shaping. Bake 42–47 minutes, extending until baked through. Bulk fermentation takes about 4–8 hours from mixing, including folds; bench rest 15–20 minutes; cold proof 8–16 hours. Allow at least 2 hours to cool. Fermentation varies with temperature and starter strength.
Equipment
- Kitchen scale and mixing bowl
- Dough scraper
- Round proofing basket or towel-lined bowl
- Covered Dutch oven
- Baking parchment suitable for the temperature
- Four lengths of food-safe, heatproof 100% cotton kitchen twine rated for the baking temperature
- Scissors and cooling rack
Recipe notes
- This loaf is pumpkin-shaped, not pumpkin-flavored.
- Use active starter maintained with equal weights flour and water.
- Room temperature and starter strength determine fermentation speed.
- Oil the twine lightly and tie loosely.
- Untested yeast alternative: Omit the starter. Use 575g bread flour, 400g water, 10g salt, and 4g instant yeast. Knead until smooth, rise until roughly doubled (about 1–2 hours), pre-shape and rest 15–20 minutes, then shape and proof until puffy (about 45–75 minutes). Tie, score, and bake as above. Follow dough cues; omit the sourdough overnight schedule.
- Store fully cooled at room temperature for up to two days, or slice and freeze for up to three months.