So, let me just start by saying that I discovered after marriage that my husband had a completely different palate than myself. He loved everything traditional Pakistani and home made and I loved everything non traditional and preferably not home made ? but time passed and I didn’t even realize when the two of us adapted to each other’s choices. Now he loves his crusty bread and I love me some goat biryani.
I am not a baker by any means so attempting this bread was out of need. I always have a stash of bread in my pantry but it was during the recent Chicago polar vortex that I forgot to pick up bread from the grocery store. I was suppose to make Chili for dinner and my husband requested if he could have some crusty bread with his chili, and I had to tell him he couldn’t because I had forgotten bread. He said it was okay and started working again, but I felt like I needed to do something and have bread ready for him before dinner because he’s not the kind of guy who makes a lot of requests. Anyway, I hit google and started going thru tons of recipes, ratios and outcomes. Many stated it was not possible to make a good bread in a little amount of time and others stated that it was possible but obviously the longer the yeast sits the better the results will be.
So, I used whatever was on hand, put my research to good use and started on my bread and for my first time it wasn’t a bad outcome at all. Anyway, now on two separate occasions that I have made this bread so far, I have seen that the bread that did not have more time was more dense whereas the bread that had more time to sit and ferment was much lighter and fluffy. So, in a short amount of time a good loaf of sour dough bread is possible but if you want bakery quality I would advise to let it ferment and rise in between the steps so you can achieve the bakery results.
For same day bread follow the instructions below, and for over night allow the dough to ferment and start following from step #3 onwards.
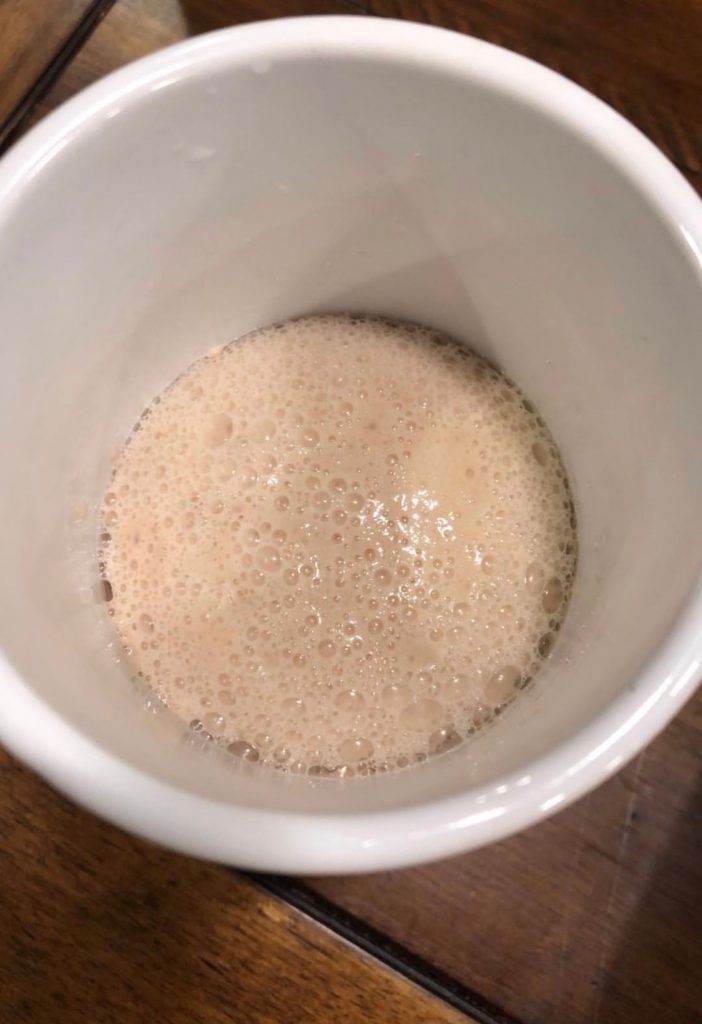
In a mug add 2 tsp of yeast, 1 tsp of sugar, 3 tbs warm water. Mix well, cover and let the yeast proof.
Details
5
Proof Overnight or
60 minutes
60 minutes
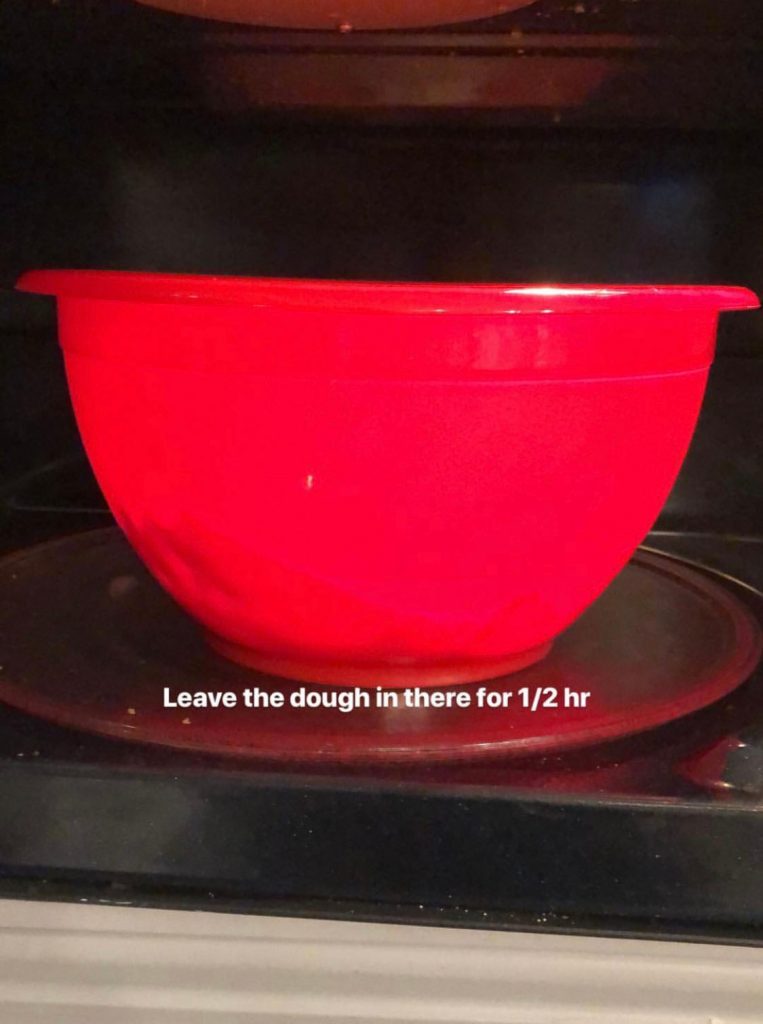
Mix flour, salt, vinegar, yeast and warm water slowly to make the dough, i used a mixer you can do it with hand. While the dough is mixing, heat your microwave for 5 minutes by running it empty. When your dough is ready it will leave the sides but will be sticky on the bottom. the dough is ready, put it in a bowl, cover it and place it in the microwave for 1/2 an hour.
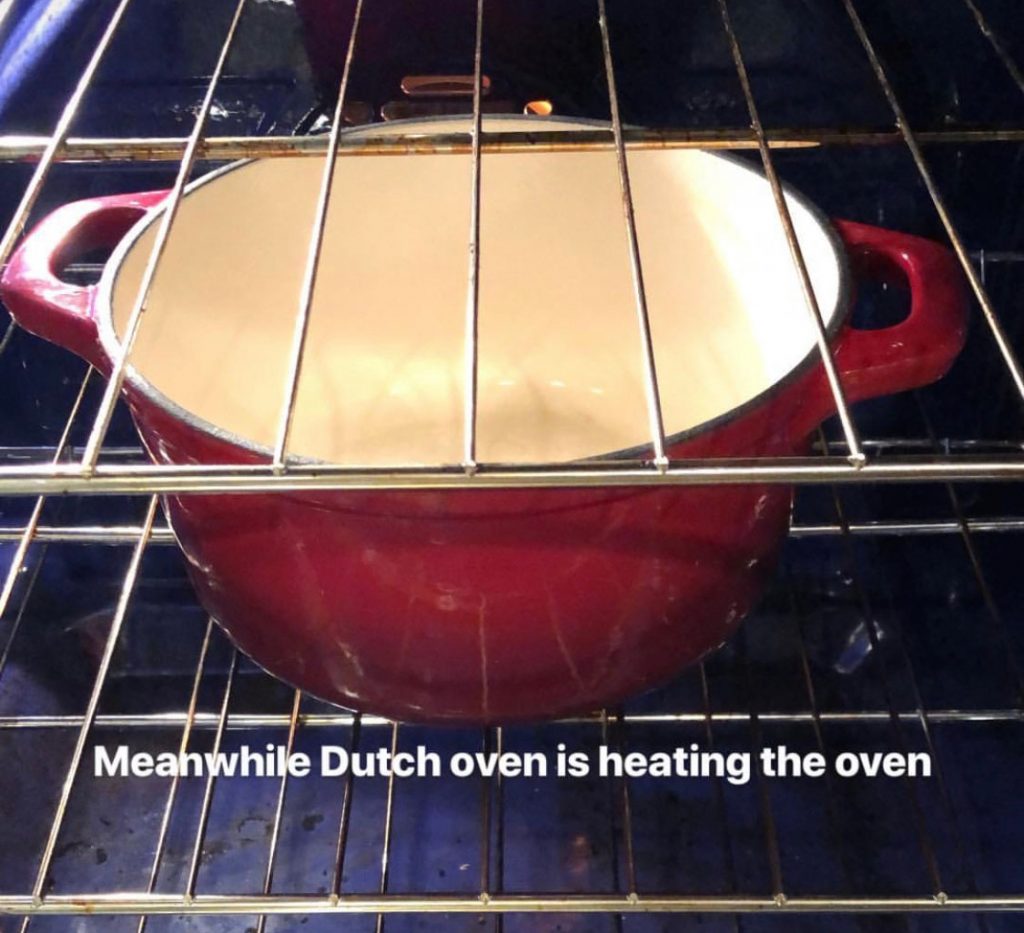
In the mean time preheat your oven to 400 degree with an empty Dutch oven.
After 1/2 an hour, run your microwave 3 times for 10 seconds with intervals and your dough should have doubled in size by now.
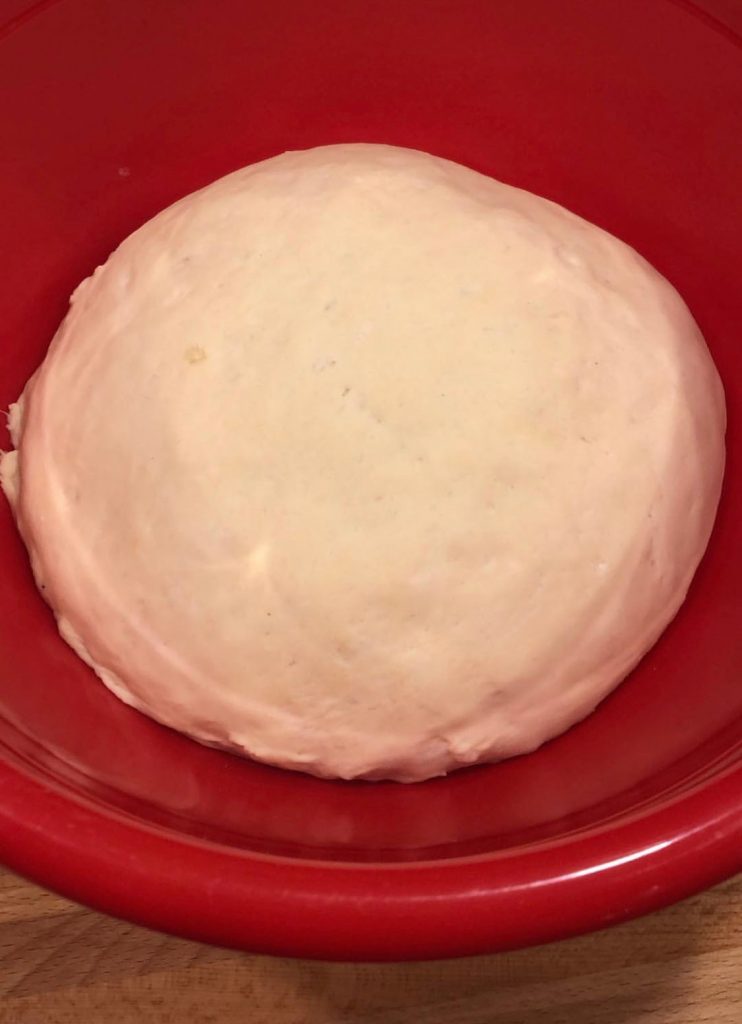
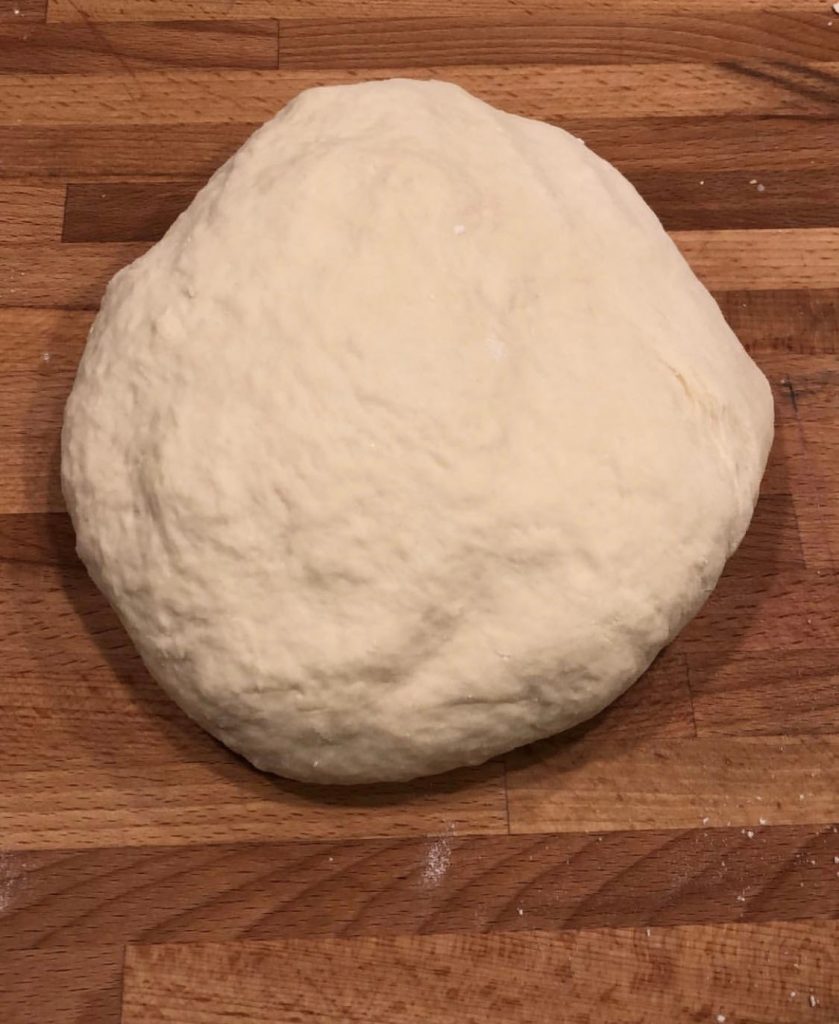
Now remove your dough from the bowl and knead it with your hands until the dough is no longer sticky and smooth.

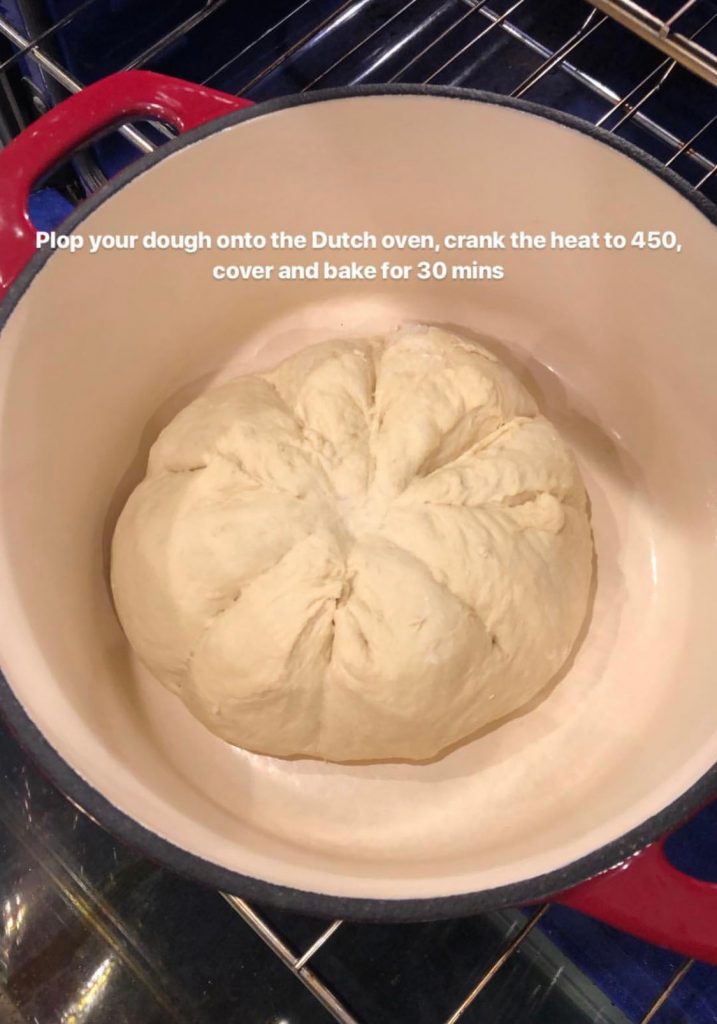
Now, at this point if you have time remove the Dutch oven from your oven plop your dough in there, carve on the surface of the dough with a sharp knife, cover it and let the dough rise in there for 1/2 an hour until it doubles in size again. Otherwise, just plop your dough in the Dutch over, cut the surface of the bread with a sharp knife, cover it and bake it for 35 mins at 400 F.
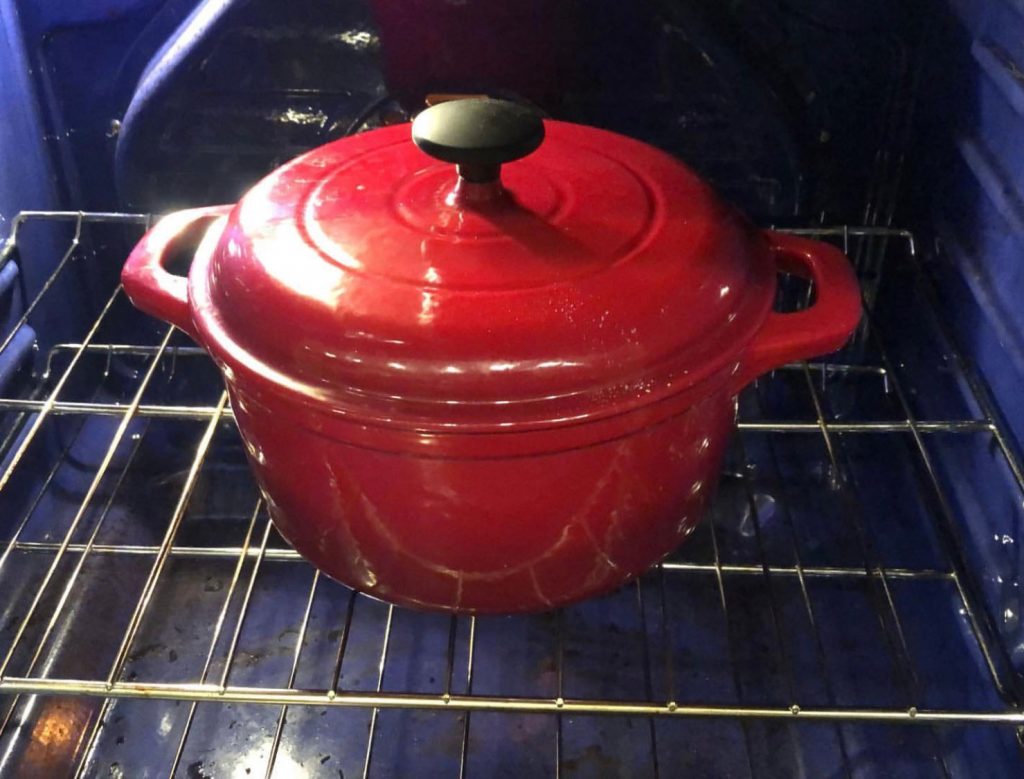
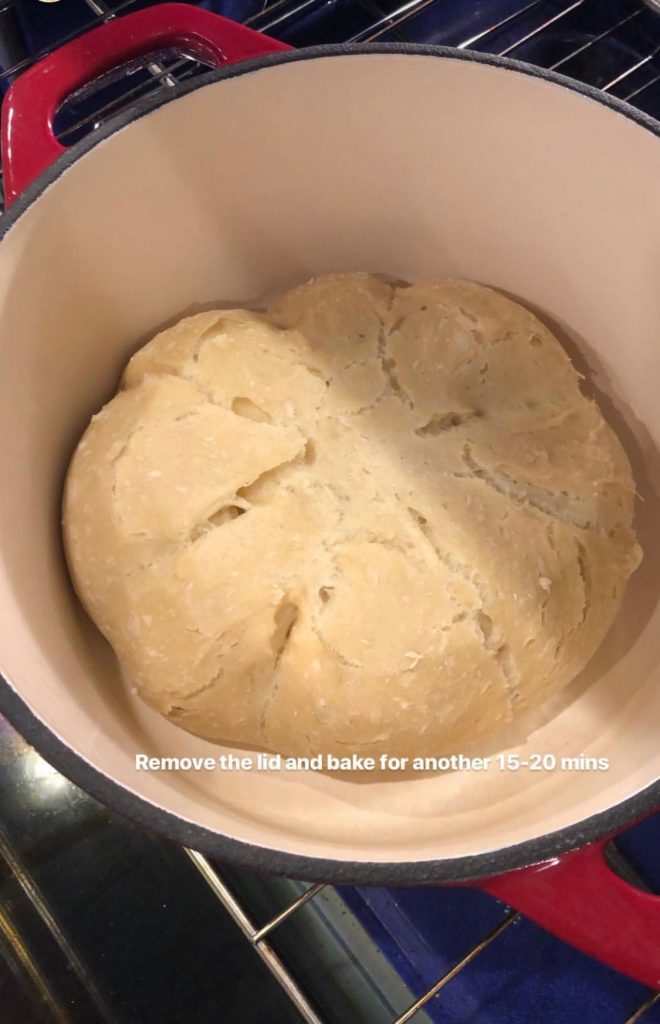
Now remove the lid and cook for another 15 to 20 minutes until the crust is crispy and golden brown color all around.
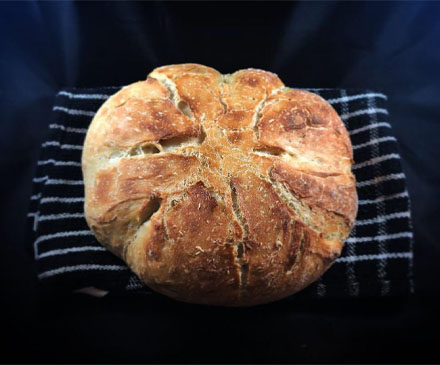
Your bread is now ready to serve!!
Sour Dough Bread
5
servings1
hour30
minutesIngredients
3 cups bread flour or APF
1 tbs vinegar
2 tsp yeast
1 tsp sugar
Coarse sea salt to taste
1 cup warm water
Directions
- In a cup add 2 tsp of yeast, 1 tsp of sugar and 3 tbs of warm water, stir, cover and leave it aside to proof.
- In a mixer add 3 cups of flour, sea salt to taste, 1 tbs of vinegar, proofed yeast and add a little water at a time until the dough is formed. Your dough should be soft and sticky, it should’ve left the sides of the mixer but still sticky at the bottom of the mixer. The dough is ready.
Option 1: remove the dough from the mixer, knead it a little with your hands to smooth it out, place it in a large bowl and let it proof over night. Than next day follow instructions from #3.
For the same day:
Remove from the mixer, smooth it out and place it in a large bowl and slide it in the pre warmed microwave for 1/2 an hour minimum to however long you have.
After 1/2 and hour has passed, run the microwave for 10 secs in 3 intervals. Your dough is now ready for the next step. - Preheat oven and an empty Dutch oven at 400 F.
- Now move your dough to a work surface, deflate it . Dust the work surface with dry flour and knead your dough until its smooth and not sticky anymore about 10-15 minutes.
- Now remove the Dutch oven from the oven, plop your dough in there, carve the surface of the bread with a sharp knife, cover and let the dough rise for 1/2 an hour.
- After 1/2 an hour has passed slide the Dutch oven in the oven for 35 minutes covered at 450 F. After 35 minutes have passed remove the lid and let the bread cook 15-20 minutes uncovered until the crust has turned golden brown all around.
- Your bread is now ready!! Enjoy hot!!

")